
Octuple for AI coding agent
This project focuses on the implementation of "Octuple for Cursor and Figma Make," a strategic initiative to standardize the visual identity and functional consistency of builds and prototypes.
AI coding is for designers
When tools like Cursor reshaped Silicon Valley, everything changed. Many junior roles disappeared, and companies cut headcount to reallocate funds into AI development. That was alarming — but it also revealed opportunity.
I've always been passionate about product development, so I leaned into side projects that let me move from consumer to creator. Building real products expanded my capabilities and enabled me to lead by example for my teammates.
Designers have long faced a persistent gap between our intent and what engineers ship. Even the best design systems leave inconsistencies. AI and new tooling give us a chance to close that gap: to prototype faster, automate tedious handoffs, and ensure fidelity from design to code.
If designers broaden their skill sets — learning tooling, product thinking, and implementation — we become indispensable. That not only extends our careers as automation advances, it positions us to take on broader leadership roles. In short: embrace creation, close the execution gap, and prepare to shape the future of product and business.
Use this as a guide to make your designer system to be understandable for AI coding agents and having the right type of prompts for you to use it. And you can access our github repo here. Download and check out the files for reference.
Understand your goal
For designers, the workflow begins in Figma. If your goal is rapid prototyping with AI-assisted code generation, Figma Make is the fastest path — ideal for proofs of concept and quick iterations. But if you’re targeting production-grade quality, read on: the next chapter covers the practices, tooling, and discipline required to move designs from prototype to reliable, maintainable product.
Production level setup (Cursor)
This setup was designed for clarity, efficiency, and continuous improvement.
Built for AI coding agents: The system is optimized for seamless use by AI coding agents, with clear conventions and predictable inputs to maximize reliability and speed.
Empowering users: It includes structured guidance and best-practice examples so users can learn how to craft effective prompts and influence agent behavior intentionally.
Iterative learning: Conversation histories and user–agent interactions are captured and analyzed to refine prompts, templates, and configuration rules for future iterations.
Roadmap and constraints: Continuous automation of learning and adaptation is an active priority. Currently, improvements are driven by designer-led analysis rather than a self-updating AI agent; full automation is planned but not yet implemented.
Component markdown file structure
In order to provide the right context to the AI coding agent, I setup all the component markdown files with
Overview
When to use and when not to use
API reference
Available props
Typescript enums
Visual states
Common patterns
Composition
Accessibility
Best practices
Common mistakes
Design guidelines
Responsive behavior
Performance considerations
Related components
Resources
In order to get the right information, I worked with engineers to get their developer documentation, my own design system guidelines, accessibility requirements from WCAG, my own design thinkings and patterns, and mistakes captured while working with AI coding agents.
Design pattern markdown file structure
I also provided the AI coding agent with overall design pattern markdown files with the following structure.
Overview
When to use and when not to use
Components used
Basic patterns
Pattern variations
Examples
Best practices
Accessibility
Related patterns
Related components
Resources
For these, I have to use my own experience of working on the patterns, working with my team members and the patterns they have created, examples from our library, WCAG sources, and things we have gathered from the accessibility team.
Guidance to AI coding agent when the user enters a prompt
I also added multiple markdown files as guidance for the agent when a prompt comes from the user. Basically, this is to guide the AI coding agent to check the markdown files for the components, patterns, design guidelines, design system developer guidance, and how it should keep updating its own guidance based on the back and forth conversation having with user. They include
Accessibility
AI learnings (living document maintained by AI agent for continuous learning)
AI quick reference
AI workflow
Component patterns
Design guidelines
Design system
Download and use guide
Important AI rules
Maintenance
Octuple API references
Verified Octuple examples
This part requires a lot more hands on work with AI coding agent using the setup I have created previously. Only through hands on work, I was able to identify feature gaps. I created more markdown files like AI learnings, AI quick references, AI workflow, download and use guide, important AI rules, and verified Octuple examples. I also gathered API documentations from the engineering documentation to provide AI coding agent with important information for reference.
Prompt guidance for users
Understanding how AI work is an important part designers need to know. To help with that, I provided the AI-prompts markdown file with sample prompts for the users to use. They include
Basic component usage
Dashboard layouts
Form
Table
Modal
Navigation
Layout
Advanced use cases
Component-specific
Tips for writing effective prompts
Example workflow
Debugging
Best practices
Template prompt
Test results
I tested the setup using three different approaches. The first approach assumed the design process began in Figma, and I used Figma MCP to construct the page. This method yields the most accurate results. Because the images were not hosted, the output did not include the profile photo or the hero image. Very minimal prompts needed to achieve this.
Figma design
Screenshot
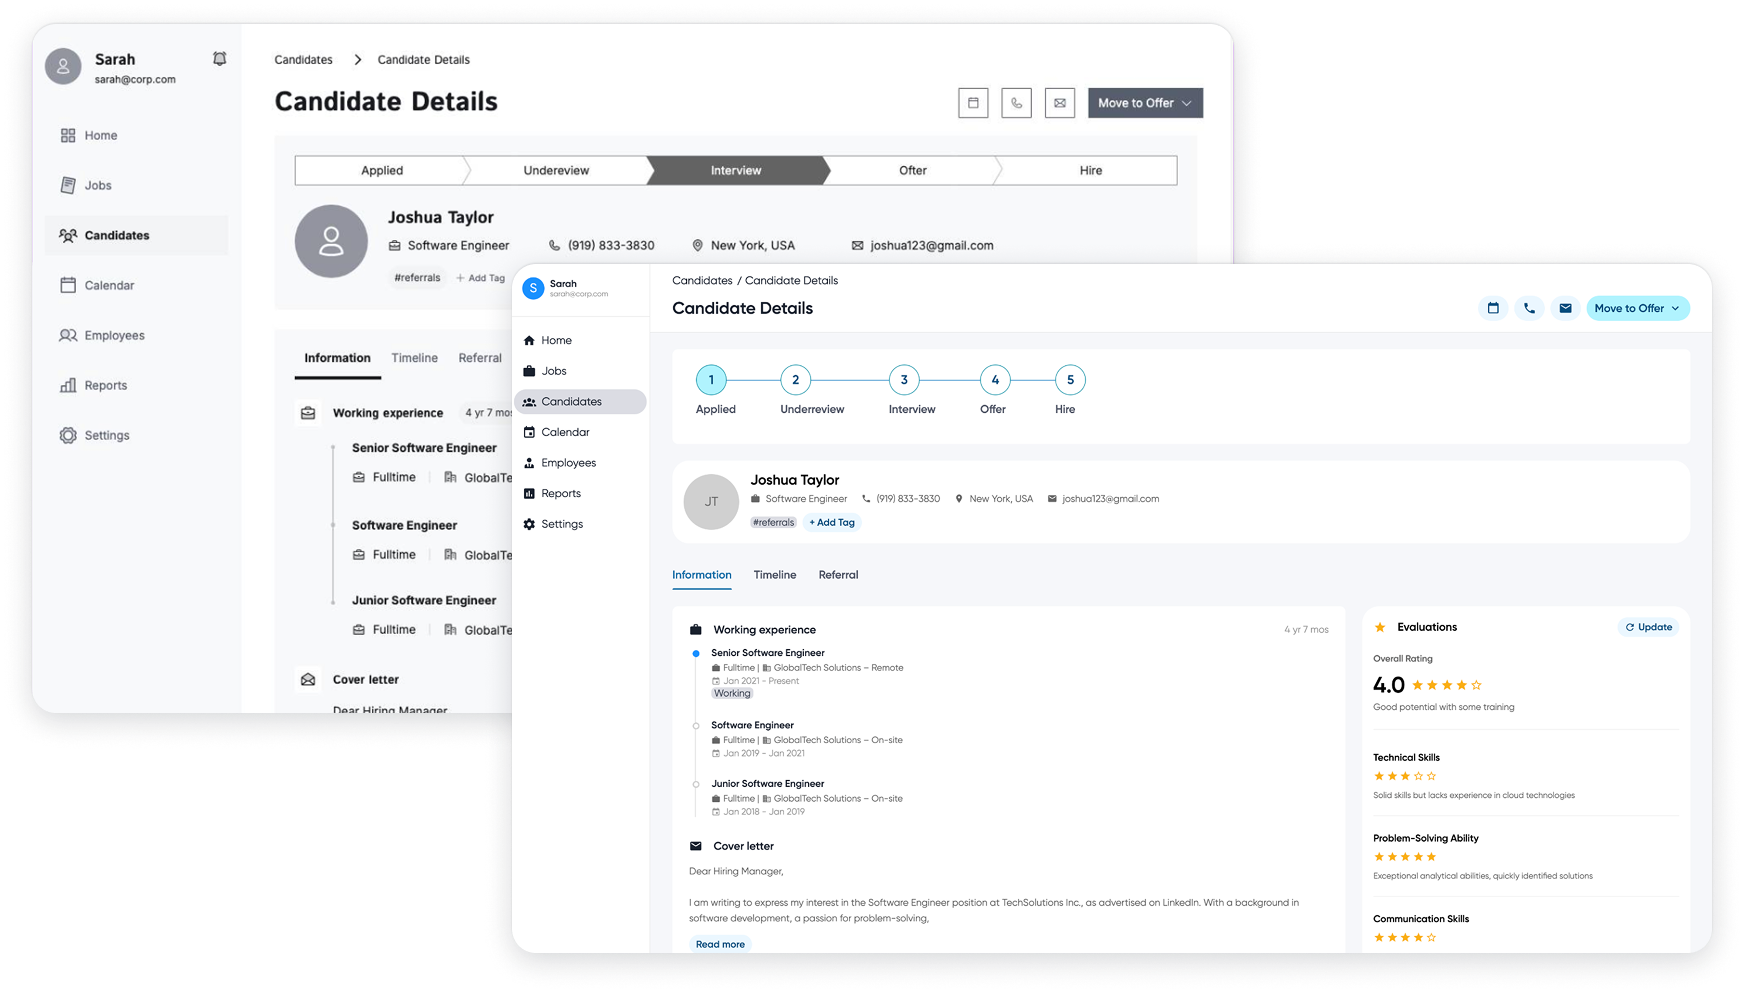
The second approach involved supplying a page screenshot and instructing an AI coding agent to recreate it. This method produced the second-best result of the three evaluated, trailing the Figma MCP server. Additional prompts were required to refine the output. Notably, the Cursor implementation used the full viewport width, whereas the screenshot included side margins.
Cursor output
Cursor output
The third approach uses a random wireframe found online and let AI coding agent build the page. This required a few more prompts needed to get the result right but it was surprisingly good enough to get the first draft.
Wireframe
Cursor output
Prototype setup (Figma Make)
Getting Figma Make to be ready is a lot easier. There are actually only three steps to get it done. Step 1 was to connect each main component to the right Github link. You can use both the Github app or code connect features inside the dev mode view.
Step 2 is where you will need to publish the component library for Figma Make usage. You will need to click on publish button and on the next step, you will see the export to Figma Make button. It will take a few minutes to complete.
Step 3 is the last step. When you are creating a new Figma Make file, click on the book button and select your component library from there. And that’s it.
Test results
I tested the setup using three different approaches just like with Cursor. The first approach assumed the design process began in Figma, and I used Figma design frame to construct the page. This method yields the most accurate results. Everything was done in a few minutes with very minimal prompts.
Figma design
Screenshot
The second approach involved supplying a page screenshot and instructing Figma Make to recreate it. This method produced draft result of the three evaluated. Additional prompts were required to refine the output. Notably, the Figma Make implementation used the full viewport width, whereas the screenshot included side margins. This was just like in Cursor as well.
Figma Make output
Figma Make output
The third approach uses a random wireframe found online and let Figma Make build the page. This required a few more prompts needed to get the result right but it was surprisingly good enough to get the first draft. The same as with Cursor.
Wireframe
Figma Make output
Conclusion
This project enabled designers and product managers to build prototypes fast and get design reviews with the senior leadership quickly, helping us with getting faster to market and in front of our clients. For designers, Cursor approach enabled them to produce pixel‑perfect frontend designs within 1–2 days and deliver production‑ready code directly to the engineering team.